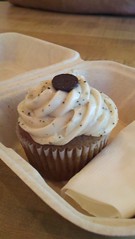
Lemon Cupcakes

2 Sep

Yesterday it was FINALLY cold enough where I could bake some cupcakes without having to worry about the dreaded heat melting or altering my cupcakes and frosting.  I do have to say, that is the one thing I did NOT take into account when I started my cupcake adventures.  But, luckily for me, Portland only has 6 week long heat spells so that is the time I just crank out the idea book and get ready for cooler weather.

I recently befriended this really cool guy on Twitter, he lives in India currently and is a food blogger himself! Nikhil Merchant.  We didn’t just meet because Twitter recommended we follow each other, we met because I was holding a Twitter contest and one of my followers Retweeted the information.  Now, for some reason, he could not find me on the system! So I kept getting this tweets about how “@CupcakeLinnie does not exist” Now that was no good so I kept replaying about how I do exist and FINALLY after 20 minutes or so we got it to work! As a thank you for trying so hard to follow me on Twitter, I told him I would send him so free cupcakes (now, this was BEFORE I knew he lived in India).  He fell in love with my Vodka Infused Lemon Drop Cupcakes, but sadly I could not sendthem to him becasue of the distance.  Luckily, he has family in the states and because I ship all over the county anyways, I knew I could complete that task!

And what perfect time too! His cousin is going off to her first year of college and just LOVE LOVE LOVES cupcakes!!! His whole family actually adores them, and Nikhil even sent me a sweet message about the memories of his Aunt, Uncle and Cousin forcing him to frost cupcakes.  With permission from him, here is what he wrote me:

My Cousin is a crazy cupcake fanatic I remember when I was in USA staying with them couple of years ago, she would make me frost cupcakes with her… haha (once she even got Louis Vuitton cupcakes made) … and my Aunt is a gem, loves food and the fine things in life, as for my uncle – crazy guy but super fun!
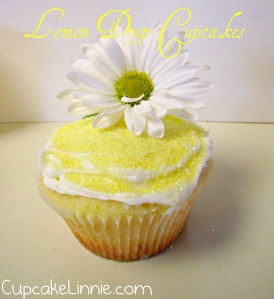
These cupcakes are a super light and moist lemon cupcake made with yogurt instead of milk (this helps it be way more moist) and a little less butter than most cupcakes (to help with the lightness) and after the cupcakes are baked, while still hot, brushed with real citrus vodka.  The buttercream frosting is a basic lemon buttercream but instead of milk, I replaced it with, yup you guessed it, VODKA!
Vodka Infused Lemon Cupcakes
I hope that they are as happy to recive and eat these Lemon cupcakes as much as I was excited to bake them and ship them off.
And remember, a cupcake WILL always help!
~Linnie

Jell-O Poke Cupcakes

29 Aug Poke Cupcakes

I made these cupcakes about a year ago and sadly I was not capturing my cupcake adventures then so I do not have any of my own personal pictures, but thankfully other people in this world were more on top of it than me and I have been able to snag (with permission) there pictures to make this blog post a little more fun. Remember, when posting pictures from other websites, it is not only the legal but the nice thing to do 🙂
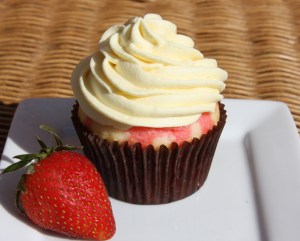
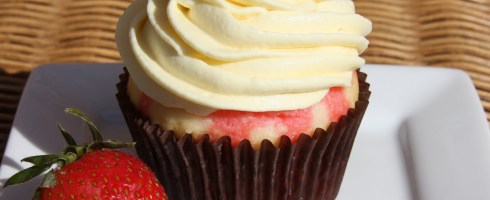
Poke Cupcakes

Picture courtesy of meandmypinkmixer.com

One of my favorite fellow baking bloggers Mike’s Baking recently made a grape flavored poke cake for his husband’s birthday but he blogged about how it did not turn out they way he wanted it to and that the jello mixture just seeped into the whole cake.  Now even though I bet it tasted wonderful, the look of it was not what he desired.  I saw this and knew I needed to help a fellow baker out and all other bakers in the world with this problem.

Before writing a post about Poke Cake, (or cupcakes really because I mean this IS a cupcake blog) I did a little internet searching for similar recipes and found that most just say to use a boxed white cake mix.  YUCK! I understand why they are out there, but whenever possible I beg of you all to bake from scratch, it is worth the time/money and you are eliminating the artificial ingredients that are packed into boxed cake mixes so you can put them in the jello we are about to use.

Okay, now that I have gotten off my soap box, let us get down to the good part…The Poke Cupcake Recipe…Unlike most white cake recipes, this one does NOT call for beating the egg whites into a stiff peak and then incorporating the mat the last second, this allows the cake to be a little denser so the jello syrup wont bleed into the whole cupcake/cake.

This recipe can also be made into a Poke Cake using a 13 x 19 inch baking pan and altering the baking time to 35 minutes.

Equipment for Jello Poke Cupcakes

  • 2 Standard 12 cup cupcake pans, or 1 used twice
  • Cupcake Liners
  • Cookie sheet (this will be explained later)
  • Measuring cups
  • Measuring spoons
  • Mixing bowls
  • Spatula
  • Wooden Skewer
  • Small Sauce Pan
  • Electric mixer

Jello Poke Cupcakes

White Cake Adapted from America’s Test Kitchen 

Recipe Yields 24 standard cupcakes or 1 13×19 inch sheet cake

White Cupcake Ingredients

  • 2 1/4 cup all purpose flour
  • 4 teaspoon baking powder
  • 1 teaspoon salt
  • 1 cup 2% milk, room temperature
  • 2 tablespoon vanilla extract
  • 6 large egg whites, room temperature
  • 12 tablespoon unsalted butter, softened
  • 1 3/4 cup granulated sugar

Preheat the oven to 350 degrees and line your cupcake pan with cupcake liners.  In a medium bowl, whisk together the flour, baking powder, and salt.  in another medium bowl, whisk together the milk, vanilla, and egg whites.  Set both bowls to the side.

In a large bowl, beat the butter and sugar together with an electric mixer on medium/high speed until light and fluffy, 3-6 minutes (walk away from it and do something else, check the oven, wash your hands, play with your kids, “a watched pot never boils” and that goes with making butter fluffy).  Reduce the mixer speed to low and beat in 1/3 of the flour mixture, followed by 1/2 of the milk mixture.  Repeat until milk is gone and end with the last of your flour mixture.  Beat until JUST incorporated.

Take your rubber spatula from your equipment check list and give the batter a final stir to make sure it is thorughly combined.  Evenly divide the batter into your cupcake pans.  I use a Standard ice cream scoop and it seems to be just about right and then you have universal cupcakes.  Bake the cupcakes until a toothpick inserted in a few cupcakes comes out pretty clean and the top of the cupcakes are very brown.  Don’t worry, that does not mean you burnt them.  About 22-25 mins, rotate the cupcakes halfway thought baking.  Let the cupcakes cool completely in the pan before adding the syrup.  This takes about 2 hours.

While the cupcakes are cooling, this is the perfect time to clean up your mess in the kitchen, clean some dishes and prep for making the Jell-O syrup.  With about 30 minutes before you are wanting to put the Jell-O on the poke cupcakes, start making the Jell-O.

Jello-O Syrup Ingredients

  • 3 ounce package of Jell-O, any flavor
  • 1 cup boiling water

Before we begin with the Jell-O syrup I have to say ,I usually make my own syrup from fresh fruits but because my blog keeps deleting itself when I am almost done, I have decided to do the shortcut way.  This way is twice as fast and just as good, I promise!

Boil your water in a small sauce pan over medium/high heat, about 10 minutes.  When just starting to boil, take off the heat and whisk in the Jell-O powder until completely dissolved.  Transfer the mixture into a heat safe bowl and let it get to room temperature, about 20 minutes.  This last step is where I differ from most Poke Cupcake Recipes, and it is well worth it.  If the syrup is too hot and runny it will soak through the WHOLE cupcake or cake and that is no good.

During the cooling period, transfer all the cupcakes to a baking sheet.  This will help keep everything clean when filling the cupcakes with syrup later. Poke 3-6 holes into each cooled cupcake using a wood skewer.  Try not to poke all the way through to the bottom of the cupcakes but do twist the skewer a bit to enlarge to the holes.
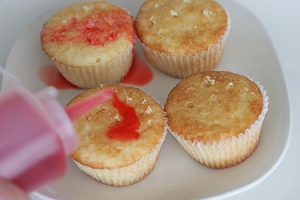
Jello Poke Cupcakes

Picture courtesy of Zuppa.com

Pour the cooled Jell-O in a plastic squeeze bottle and slowly pour the syrup into each hole of the cupcakes.  Remember, it is better to put less in at first than too much.  You can always add but never can take out.  Once all the holes are filled, loosely cover the cupcakes with plastic wrap and store them in the refrigerator for 2-3 hours, to let the Jell-O set.

If you are making a Poke Cake, No need to transfer the cake to a new pan, poke 50 holes in the cake, and pour the syrup evenly across the whole cake: do not spread it for that will make for a soggy cake.

Whipped Cream Topping

  • 2 cups heavy cream, chilled
  • 2 tablespoon granulated sugar

Before serving, whip the chilled cream and sugar together with an electric mixer on medium/high speed until a soft peak forms and top each cupcake after the Jell-O has set.
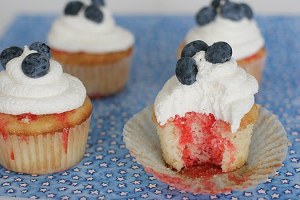
Jello Poke Cupcakes

Picture courtesy of Zuppa.com

Once the it is set and decorated you should have a lovely poke cupcake with colorful lines running right through it!  Now it is time to enjoy your yummy goodness! Please, let me know how your poke cupcakes turned out, I really would love to know. Also let me know what flavor you used for your Jell-O.

And remember, a cupcake WILL always help!

~Linnie

Cupcake in a Mug

25 Aug

Linnie with Cupcake in a mug

For the past three weeks I have had this 5 minute single serving cupcake recipe in my ‘to do’ list and last night was the night to make it happen! It was way too hot to bake but everyone in the house was jonesing for something sweet and delicious!  And because I have put myself on a NO ICE CREAM diet (which was the worst idea ever), I pulled this baby out!

This recipe is originally called, “Cake in a Mug” but because this blog is all about cupcakes, I just had to make it “Cupcake in a Mug” 🙂

There were mainly only chocolate 5 minute cake recipes and I just don’t crave chocolate ever, so my search for a vanilla cake in a mug took some time.  But, alas I found one and after some modification, I do think it is pretty yummy for something that came out of a microwave.

I hope my modifications to this recipe hold true to your adventures into baking.  Let me know how it goes!

Equipment for Cupcake in a Mug

Cupcake In a Mug Ingredients

  • Coffee mug (any size over 6 oz works wonders)
  • A fork
  • Measuring spoons
  • Microwave

Cupcake in a Mug Recipe

Recipe Adapted from The Ultimate Cake-In-A-Cup

Makes 1 large cupcake, and if you are feeling generous it can be easily shared but not necessary.

  • 4 tablespoon Self Rising Flour
  • 4 tablespoon Granulated Sugar
  • 1 egg, doesn’t have to be at room temperature
  • 3 tablespoon Milk, any percent will do
  • 3 tablespoon Oil, vegetable or canola
  • ¼ teaspoon Vanilla extract

Before adding anything to your mug, spray a little baking oil around it so the cupcake can easily slide out. This part is not necessary but just makes life easier.

cupcake in a mug

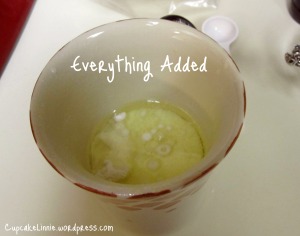
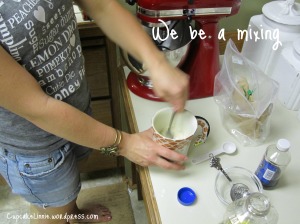
In the mug, add the flour and sugar first.  Then crack the egg on top of the dry ingredients.  Add the milk, oil and vanilla.  Now…Mix it with a fork until there are little to no clumps.

Cupcake in a mug mixing

Pop it in the microwave for 2.5-3.5 minutes depending on the power of your microwave.  Now, I have a sad little microwave I have had since my college years so mine took 4 minutes to cook, but you can always stop at 2.5 minutes and do the toothpick check!

Let the cupcake sit in the mug for 2 minutes and then slide out into a plate.  If the cupcake is a little stuck to the mug just wiggle it out with that fork of yours.

This recipe can be made into a Chocolate Cupcake in a Mug by just adding 2 tablespoon of coca powder to the flour.

 Now, because my boyfriend loves chocolate and I do not, we compromised with having the cupcake being vanilla and the frosting being chocolate.  We used a very basic chocolate frosting.

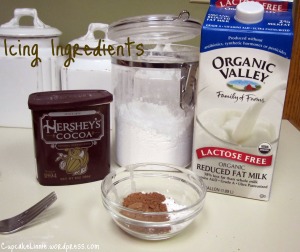
 Chocolate Icing Recipe

cupcake in a mug chocolate icing

Recipe Adapted from The Ultimate Cake-In-A-Cup

  •  2 tablespoon confectioner’s sugar
  • 1 teaspoon cocoa powder
  • 1 teaspoon milk

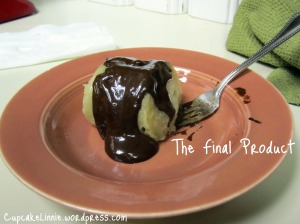
Take that mug you just had your cupcake in and add all of the ingredients!  Now mix that all up with that fork you used.  Mix until smooth.  You can add more milk until you get your desired consistency.  My boyfriend likes his more like a pudding so we used less milk.  Drizzle over the cupcake or however you want to garnish.

cupcake in a mug final product

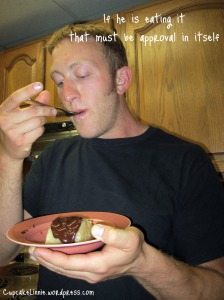
Now…the best part EATING IT!!!!!!

cupcake in a mug

I promise you, it takes longer to read my blog post than it does to make the cupcake in a mug!

Next time I think I will try putting cinnamon into the batter or maybe so red hots! The possibilities are endless!  What would you add into your Cupcake in a Mug?

 And remember, a cupcake WILL always help!

~Linnie

All Purpose Gluten Free Flour Mix

17 Aug

After posting how to convert traditional baking recipes into gluten free recipes, I realized that some may not know what a good gluten free flour mix is OR how to make your own GF flour mix.  But you are in luck! Instead of having to do the dirty work of finding a decent tasting GF flour mix, I did it for you…your welcome 🙂

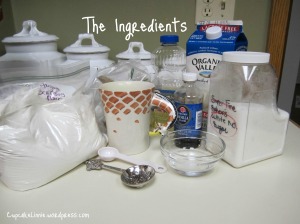
Gluten Free Flour Ingredients

Now, the trouble with finding a really good GF flour mix is making sure it doesn’t taste too grainy.  And believe you me, this is pretty tough to find, but once you do you are in heaven.  You are looking for a superfine brown rice flour.  Authentic Foods has a very good brown rice  flour, try to avoid Arrowhead Mills; it might be inexpensive but the cost reflects in the quality.  Ener-G and Bob’s Red Mill works well too, I just advise to run it through a food processor for a few seconds to get it super superfine.  The brands of the potato starch and tapioca flour doesn’t really matter, they all seem to work pretty well.

When I first started baking with Gluten Free products, I got really confused on what everything was.  Below are some definitions of some ingredients you will be seeing a lot when baking GF.

  • Brown Rice Flour: Essentially it is brown rice milled very finely from the whole kernel.
  • Potato Starch: Not the same at potato flour. It is a thickening agent made from skinned potatoes and creates a tender crumb you normally would get with traditional baking.
  • Tapioca Flour: Also called Tapioca Starch.  A mild starchy flour that can be widely used in almost any GF baking recipe.  Can use to substitute cornstarch in regular cooking.
  • Xathmun Gum: This is a plant gum that mimic gluten in every way except for being actually gluten!  it provides structure and elasticity

Basic Gluten Free Flour Mix
Adapted from Cybele Rascal 

  • 4 cups superfine brown rice flour
  • 1 1/3 cups potato starch (not potato flour)
  • 2/3 cup tapioca flour (also called tapioca starch)

Combine all ingredients in a bowl and whisk until thoroughly mixed and there are no clumps.  Store in an airtight container or zip-lock bag.  You can put it in the refrigerator to ensure freshness, but if you are like me and you have no room at all, keeping it in a cool dark cupboard works just as well!  
Makes 6 cups
Will stay fresh for up to 6 months 

Now, if you are not wanting to make your own gluten free mix, there are some really good pre-made mixes.  

And remember, a cupcake WILL always help!
~Linnie